Congratulations on acquiring the Blue Yeti, the world’s number one USB microphone! This leading audio device is widely popular for producing high-quality sound. Recognized for its professional-grade audio, it captures crystal-clear audio with exceptional clarity. It offers advanced features for diverse recording needs.
Overview and Key Features
The Blue Yeti stands out as the world’s number one USB microphone, renowned for its professional-grade audio quality and user-friendly design. This leading audio device is engineered with advanced features, enabling it to capture crystal-clear sound with exceptional clarity and accuracy across various applications. Its popularity stems from its capability to deliver high-quality recordings for diverse needs, ranging from vocals and podcasts to musical instruments and streaming content.
A significant highlight of the Blue Yeti is its innovative tri-capsule array, a core technology that underpins its versatility. This array empowers the microphone to offer four unique recording patterns: stereo, cardioid, omnidirectional, and bidirectional. These multiple pattern options provide recording possibilities that typically require several specialized microphones, making the Yeti an all-in-one solution for creators. Furthermore, the Blue Yeti boasts remarkable ease of use, connecting seamlessly to your computer via a supplied USB cable without requiring additional drivers for both Windows and macOS systems. This plug-and-play functionality ensures that users can achieve amazing results quickly with their favorite recording software.
Blue Yeti Product Specifications
The Blue Yeti is renowned for its robust product specifications, establishing it as a top-tier USB microphone for a multitude of audio tasks. At its core, the device is engineered to deliver professional-grade audio quality, capturing sound with exceptional clarity and accuracy. Its leading design ensures high-fidelity recordings, making it a popular choice for capturing vocals, podcasts, instruments, and various other audio content.
A defining technical feature is its innovative tri-capsule array. This advanced array technology is fundamental to the Yeti’s versatility, enabling it to offer four distinct recording patterns: stereo, cardioid, omnidirectional, and bidirectional. This multi-pattern capability means users can adapt the microphone to different recording environments and source types, achieving optimal sound capture without needing multiple specialized microphones.
Connectivity is straightforward, designed for ease of use across major operating systems. The Blue Yeti connects to computers via a standard USB cable, operating in a plug-and-play fashion. This means no additional drivers are required for setup on either Windows or macOS, facilitating immediate use. Its robust build and integrated stand further enhance its utility, providing a stable and reliable recording solution straight out of the box.

Tri-Capsule Array Technology
The Blue Yeti’s distinguishing feature is its innovative tri-capsule array technology. This advanced design incorporates three condenser capsules meticulously arranged to capture sound from multiple directions. This sophisticated internal architecture is what grants the Yeti its remarkable versatility, allowing it to adapt to a wide range of recording scenarios with a single device.
Unlike conventional microphones that often specialize in a single pickup pattern, the tri-capsule array empowers the Blue Yeti to offer four distinct recording patterns: stereo, cardioid, omnidirectional, and bidirectional. This means users can effortlessly switch between modes to optimize their audio capture based on the sound source and environment. For instance, recording an interview might utilize a bidirectional pattern, while a group discussion benefits from omnidirectional. This capability eliminates the need for multiple microphones to achieve diverse sonic results, streamlining setups for podcasters, streamers, musicians, and voice-over artists.
The precision engineering of the tri-capsule array ensures that each pattern delivers crystal-clear, high-fidelity audio, maintaining the professional-grade sound quality Blue Microphones are known for. This core technology is fundamental to the Yeti’s reputation as a highly adaptable and top-performing USB microphone.

Basic Setup and Connection
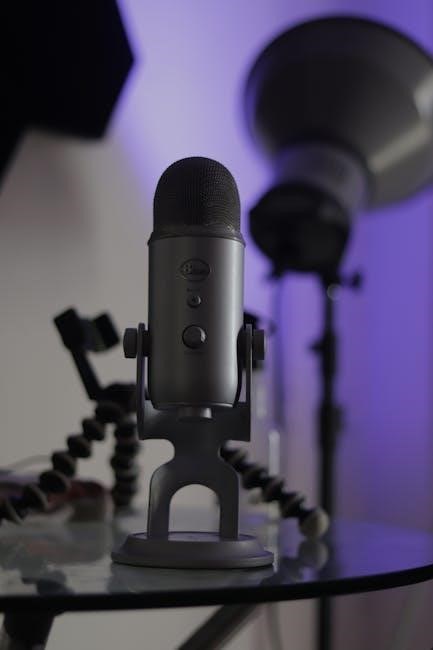
Connecting your Blue Yeti is simple and intuitive. Utilize the included USB cable to link the microphone directly to your computer. The LED above the Blue logo will glow red, indicating power and a ready state. This plug-and-play design ensures quick integration.

Connecting Yeti via USB Cable
Establishing the initial connection for your Blue Yeti microphone is a straightforward process, primarily relying on the provided USB cable. To begin, locate the USB port on the base or side of your Yeti microphone. Take one end of the supplied USB cable and securely insert it into this port. Next, take the other end of the USB cable, which is typically a standard USB-A connector, and plug it into an available USB port on your computer, whether it’s a desktop PC or a laptop. Upon a successful connection, you will observe a distinct red LED light illuminating just above the Blue logo on the microphone. This glowing indicator serves as a visual confirmation that the microphone is receiving power and is ready for the next steps in its setup; A significant advantage of the Blue Yeti’s design is its plug-and-play functionality. For most operating systems, including Windows and macOS, no additional drivers are required for the basic connection and recognition of the device. This simplicity ensures ease of use and reliable performance right out of the box, allowing users to quickly integrate the Yeti into their recording or streaming setup without complex installations. This direct USB connection provides a stable digital audio pathway to your computer.
Physical Microphone Orientation
Proper physical orientation of your Blue Yeti microphone is absolutely crucial for capturing optimal audio quality, aligning with its advanced features for clear, crisp sound. After unboxing, rotate the microphone 180 degrees so the iconic Blue logo and headphone volume control directly face you, the user or primary sound source. This precise positioning ensures the internal tri-capsule array’s primary pickup elements are correctly aligned for optimal performance. For most standard recording scenarios, such as podcasts, vocals, or streaming, the Yeti should typically be positioned upright on its desktop stand, with grilles pointed directly towards the sound source. The microphone captures sound most effectively from its front when using patterns like cardioid. When utilizing other patterns, like stereo or bidirectional, proper orientation becomes equally important to leverage the tri-capsule array’s capabilities. This enables diverse recording possibilities that usually require multiple microphones. For instance, in a cardioid pattern, speaking directly into the front, where the Blue logo is displayed, yields optimal results, minimizing extraneous background noise. Adjusting the tilt on its stand can also direct capsules precisely towards instruments or specific vocal angles, ensuring accurate professional-grade audio capture for any source.

Software Configuration and OS Setup
Setting up your Blue Yeti involves straightforward software configuration across various operating systems. While often plug-and-play, optimizing its performance may include installing Logitech G HUB and adjusting settings for Windows 10 or macOS to integrate with recording software effectively.
Installing Logitech G HUB
While the Blue Yeti often functions as a plug-and-play device upon USB connection, installing Logitech G HUB software is essential for unlocking its full capabilities and accessing advanced microphone controls. This dedicated application empowers users to fine-tune various aspects of their Blue Yeti, moving beyond basic default operation. The installation process typically begins by downloading the G HUB installer from the official Logitech website. Users should then execute the downloaded file and diligently follow the clear, on-screen prompts that guide them through a standard software installation. A stable internet connection is advisable during this phase for a smooth download and setup. Upon successful installation, G HUB usually automatically detects a connected Blue Yeti, presenting an intuitive interface for managing microphone settings. This includes adjusting gain, monitoring headphone volume, and crucially, selecting among the microphone’s distinct recording patterns: stereo, cardioid, omnidirectional, and bidirectional. These pattern selections are vital for adapting the microphone to diverse recording environments and sources. Furthermore, G HUB facilitates firmware updates, ensuring the Yeti benefits from the latest performance enhancements and bug fixes. For specific models, like the Yeti Pro, G HUB offers even more comprehensive and granular control, making its setup indispensable for professionals requiring meticulous audio customization. This installation significantly enhances the user’s control over their Blue Yeti.
Blue Yeti Setup for Windows 10
Setting up your Blue Yeti microphone on Windows 10 is a straightforward process, largely due to its plug-and-play design that typically requires no additional drivers. The initial step involves connecting the Blue Yeti to your computer using the supplied USB cable. Once properly connected, the LED indicator located just above the Blue logo on the microphone will illuminate red, signaling that the device is receiving power and is active. Windows 10 should automatically recognize the Blue Yeti as an audio input device. To ensure optimal functionality, you’ll need to confirm it’s selected as your default microphone. This can be done by right-clicking on the speaker icon in your system tray, then navigating to “Sound Settings” or “Open Sound settings.” Within the Sound Settings window, under the “Input” section, use the dropdown menu to select “Blue Yeti” as your input device. From here, you can also adjust the microphone’s input volume or gain to a suitable level for your environment. While the Yeti works immediately, this basic configuration ensures Windows 10 is routing audio correctly, making it ready for use with various applications like recording software, communication platforms, or streaming services. This foundational setup allows you to begin capturing high-quality audio without delay.
Blue Yeti Setup for macOS
Setting up your Blue Yeti microphone on a macOS system is designed to be straightforward and user-friendly, much like its Windows counterpart. The process begins by connecting the Yeti to your Mac using the provided USB cable. Once plugged in, the LED light above the Blue logo on the microphone will illuminate red, indicating it’s powered and ready. macOS typically recognizes the Blue Yeti automatically without the need for additional driver installations, providing a true plug-and-play experience. To configure it as your primary audio input, navigate to your Mac’s “System Settings” (or “System Preferences” on older macOS versions). From there, select “Sound,” and then click on the “Input” tab. In the list of available input devices, choose “Blue Yeti.” You will also find an input volume slider in this section, allowing you to adjust the microphone’s gain to an appropriate level to prevent distortion or ensure sufficient loudness. After these simple steps, your Blue Yeti will be fully configured and ready for use with any recording software, communication applications, or streaming platforms on your macOS device, ensuring high-quality audio capture for your projects.
Software Integration for Recording

The Blue Yeti seamlessly integrates with a wide array of recording and streaming software, making it a versatile tool for content creators and communicators alike. Once your microphone is connected and recognized by your operating system, the next crucial step is to select it as the audio input device within your preferred application. Whether you’re using digital audio workstations (DAWs) like Audacity or Ableton Live, video editing suites such as GarageBand or Adobe Premiere, or communication platforms like Skype, Zoom, or Discord, the process generally involves navigating to the audio or sound settings within that specific program. Look for an ‘Input Device’ or ‘Microphone’ selection menu and choose ‘Blue Yeti’ from the list of available options. Many applications also offer an input gain control, allowing for fine-tuning of your microphone’s sensitivity directly within the software, independent of the physical gain knob on the Yeti itself. This dual control ensures optimal audio levels, preventing clipping or overly quiet recordings. This straightforward integration ensures that the Yeti’s renowned audio quality is consistently delivered across various digital environments, enhancing podcasts, voiceovers, music recording, and live streams.

Understanding Recording Patterns
The Blue Yeti features an innovative tri-capsule array, enabling it to record with four distinct patterns: stereo, cardioid, omnidirectional, and bidirectional. This provides versatile recording possibilities, adapting to various audio capture scenarios that typically require multiple microphones for optimal results.
Stereo Pattern
The Stereo Pattern on the Blue Yeti is engineered to capture a wide, natural sound image, making it ideal where spatial realism is paramount. This mode utilizes both microphone capsules to create distinct left and right audio channels, effectively emulating how human ears perceive sound within a three-dimensional space. It excels at recording musical performances, capturing broad instrument spread, or immersive field recordings where ambient details are crucial. For instance, recording an acoustic guitar, a small ensemble, or a live event’s atmosphere benefits immensely from this pattern.
When employing the Stereo Pattern, careful consideration of the microphone’s orientation and distance from the sound source is essential to achieve the desired depth and width in your recording. The Yeti’s innovative tri-capsule array, a key feature highlighted in its design, grants users flexibility to switch to this pattern without needing multiple specialized microphones. This versatility simplifies setup for capturing rich, detailed soundscapes, offering professional-grade stereo recording capabilities for podcasters, musicians, and content creators aiming for a full, enveloping audio experience. Experimentation with placement optimizes the stereo field for any recording environment, ensuring compelling sonic results and enhanced audio fidelity.

Cardioid Pattern
The Cardioid Pattern on the Blue Yeti is specifically engineered to capture sound directly from the front of the microphone, making it an indispensable choice for single-source audio recordings. This directional pickup pattern excels at minimizing unwanted background noise by effectively rejecting sounds originating from the sides and rear. Consequently, it ensures that the primary sound source—be it your voice for a podcast, commentary for a stream, a solo vocal performance, or an instrument—remains clear and prominent. Its ability to isolate sound makes it the preferred setting for content creators, voice actors, and musicians alike, particularly when working in less-than-ideal acoustical environments where room reverberation or ambient sounds could otherwise compromise audio quality. The Blue Yeti’s innovative tri-capsule array facilitates effortless selection of this focused pattern, offering professional-grade sound isolation without requiring complex setups. For optimal results, always position the Blue Yeti so the ‘Blue’ logo faces directly towards the sound source. This precise orientation maximizes front-facing sound capture and significantly enhances audio clarity, delivering crisp, professional-sounding recordings that truly stand out.
Omnidirectional Pattern
The Omnidirectional Pattern on your Blue Yeti microphone is expertly designed to capture sound equally from all directions, providing a complete 360-degree audio pickup. This versatile setting, powered by the Yeti’s innovative tri-capsule array, records sound uniformly, regardless of the sound source’s position around the microphone. It’s an ideal choice for scenarios where capturing the entire soundscape of a room or multiple voices simultaneously is crucial. For instance, when hosting group podcasts with several participants seated around a table, conducting a conference call, or recording live performances where audience reaction and ambient room tone are desired, the omnidirectional pattern excels. It also works exceptionally well for capturing immersive ambient sounds, creating a rich atmosphere, or documenting environmental recordings where the natural acoustics of a space are paramount. Unlike directional patterns, it doesn’t necessitate precise microphone placement for each individual speaker, significantly simplifying setup for multi-person recordings. This pattern ensures every voice and sound within the vicinity is recorded with remarkable clarity, offering a truly comprehensive and natural audio representation of your recording environment. This makes it indispensable for achieving a full, authentic sound without needing multiple microphones.
Bidirectional Pattern
The Bidirectional Pattern on the Blue Yeti microphone is a highly specialized setting, often referred to as a “figure-8” pattern, which captures sound equally from the front and the rear of the microphone while significantly rejecting sounds from the sides. This unique capability is powered by the Yeti’s innovative tri-capsule array, allowing for precise and focused audio acquisition from two opposing directions. It is an indispensable tool for specific recording scenarios where isolating two sound sources is paramount. For example, it is perfectly suited for conducting face-to-face interviews, ensuring both the interviewer and interviewee are captured with exceptional clarity and balance, minimizing ambient noise from the room’s periphery. Similarly, for recording musical duets, such as two vocalists or instrumentalists positioned opposite each other, this pattern provides distinct separation and a clean sound. The bidirectional pattern effectively concentrates the audio pickup on your desired subjects, making it a powerful choice for podcasts, vocal duets, or capturing dialogues where focused two-way communication is key. Its ability to reject off-axis sound enhances the overall quality, delivering professional-grade results by minimizing unwanted interference and emphasizing the primary audio sources.

Optimizing Performance and Use Cases
To maximize your Blue Yeti’s performance, understanding optimal settings is vital. This section explores configurations for various use cases, ensuring professional-grade audio. Learn to tailor your microphone effectively for recording, streaming, and other applications, achieving superior sound quality.
Best Settings for Blue Yeti
Optimizing your Blue Yeti involves selecting the correct recording pattern and precise gain. Its innovative tri-capsule array offers four distinct patterns. For solo vocals, podcasts, or streaming, the Cardioid pattern is best, capturing front sound and minimizing background noise for focused audio. For multiple people or ambient sounds, the Omnidirectional pattern is ideal, picking up audio evenly from all directions. For music or immersive soundscapes, the Stereo pattern delivers realistic left-right separation, enhancing depth. The Bidirectional pattern suits two-person interviews, capturing front and rear audio while rejecting side interference. Crucially, adjust microphone gain to prevent clipping and ensure optimal volume. Software integration, via Logitech G HUB, further refines these settings. Experimentation is vital to finding the perfect configuration for your specific environment and desired audio quality, ensuring truly professional results from your Blue Yeti.
Blue Yeti Setup for Streaming
Setting up your Blue Yeti for streaming ensures high-quality audio for your audience, making your broadcasts sound professional. Begin by connecting your Yeti to your computer using the provided USB cable; observe the LED above the Blue logo illuminate red, confirming power. A crucial step is to install Logitech G HUB, the dedicated software for managing your microphone. This application allows you to access and fine-tune various settings, which is vital for optimal performance in a live streaming environment. For most individual streamers, the Cardioid pattern is the go-to choice, as it captures sound directly from the front, significantly reducing unwanted ambient noise from your surroundings. Proper microphone placement, typically 6-12 inches from your mouth, is also key. Adjust the physical gain knob on the Yeti to achieve a robust, clear input signal without distortion. Finally, within your preferred streaming software like OBS Studio or Streamlabs OBS, select the Blue Yeti as your primary audio input. This integration, coupled with potential in-software filters such as noise gates or compressors, will elevate your streaming audio to a professional standard, leveraging the Yeti’s renowned capabilities for excellent broadcast quality.