Yamaha RX-V377 Receiver: A Comprehensive Guide
Date of Information: 03/24/2026 06:10:49. This guide provides detailed instructions and insights into operating your Yamaha RX-V377 audio receiver effectively.
Welcome to the world of immersive audio! The Yamaha RX-V377 is a 5.1-channel AV receiver designed to deliver a captivating home theater experience. Released with a focus on user-friendliness and quality sound‚ this receiver serves as the central hub for all your entertainment needs;
This receiver supports 4K Ultra HD video pass-through‚ ensuring stunning visuals alongside its impressive audio capabilities. It’s an excellent choice for those seeking a balance between performance and affordability. The RX-V377 boasts a variety of features‚ including built-in Wi-Fi for seamless streaming and Yamaha’s renowned YPAO room calibration technology.
This guide will walk you through every aspect of the RX-V377‚ from initial setup to advanced configuration‚ helping you unlock its full potential. Information current as of 03/24/2026.
Key Features and Specifications
The Yamaha RX-V377 delivers 85W per channel at 8 ohms‚ providing ample power for most home theater setups. It supports 4K Ultra HD pass-through with HDCP 2.2 compatibility‚ ensuring optimal video quality. HDMI 2.0a connectivity allows for smooth playback of high-resolution content.
Built-in Wi-Fi and Bluetooth enable wireless streaming from various devices. YPAO (Yamaha Parametric Room Acoustic Optimizer) automatically calibrates speaker settings for the best sound in your room. It features 4 HDMI inputs and 1 HDMI output. Audio formats supported include Dolby TrueHD and DTS-HD Master Audio. Information current as of 03/24/2026.
Setting Up Your RX-V377
Initial setup involves connecting the receiver to power and your display device via HDMI. Ensure all connections are secure before powering on. The YPAO microphone‚ included in the box‚ is crucial for automatic speaker calibration – place it at ear level in your primary listening position.

Follow the on-screen instructions to configure speaker sizes‚ distances‚ and levels. Proper speaker placement significantly impacts sound quality; refer to the manual for optimal positioning. As of 03/24/2026‚ double-check all wiring before proceeding to avoid potential issues. A stable setup is key for enjoying your home theater experience.
Unboxing and Initial Connections
Carefully unpack the Yamaha RX-V377‚ verifying all included components: receiver‚ remote control‚ YPAO microphone‚ and documentation. Connect the power cord to a grounded outlet. Then‚ using a high-speed HDMI cable‚ connect the receiver’s HDMI OUT to your TV or projector’s HDMI IN (ARC capable is recommended).
As of 03/24/2026‚ ensure the receiver is powered OFF during all connections. Initially‚ avoid connecting speakers or source devices; focus solely on the power and HDMI link. This minimizes potential complications during the initial power-up sequence and allows for proper receiver recognition of the display.
Speaker Configuration and Placement
The RX-V377 supports up to a 5.1 channel speaker system. Connect front left/right‚ center‚ and surround speakers to the corresponding terminals‚ ensuring correct polarity (+ to +‚ ― to -). As of 03/24/2026‚ optimal placement involves positioning front speakers equidistant from the listening position‚ angled inwards.
The center speaker should be directly below or above the TV. Surround speakers should be slightly behind the listening area. Connect the subwoofer to the SUBWOOFER OUT terminal. Run speaker wires securely‚ avoiding interference. Utilize the receiver’s speaker setup menu to define speaker sizes and distances for accurate sound calibration.
Understanding the Remote Control
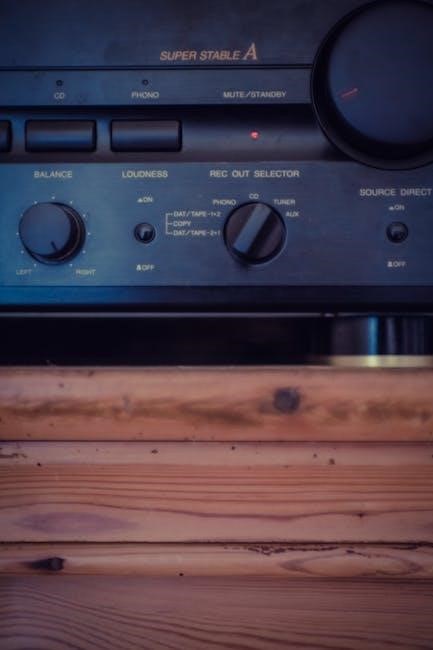
As of 03/24/2026‚ the Yamaha RX-V377’s remote control provides comprehensive control over your audio experience. Key buttons include POWER‚ INPUT SOURCE selection‚ VOLUME control‚ and SOUND MODE adjustments. The CURSOR keys navigate on-screen menus for settings customization. Dedicated buttons allow direct access to streaming services and surround sound presets.
The SETUP button unlocks advanced configuration options. Utilize the numeric keypad for direct input selection. Remember to install fresh batteries for optimal performance. Refer to the receiver’s manual for a detailed button layout and function descriptions. Proper remote operation enhances usability.
Main Functions of the Remote
Updated 03/24/2026‚ the RX-V377 remote’s core functions streamline operation. The POWER button initiates system on/off. INPUT selects audio sources (HDMI‚ Optical‚ etc.). VOLUME adjusts the listening level‚ while MUTE silences the sound. SOUND MODE cycles through presets like Stereo‚ Dolby Surround‚ and Pure Direct.
The SETUP button accesses receiver settings. The CURSOR keys navigate menus. Numeric buttons enable direct input selection. The INFO button displays current playback information. The SCENE buttons store and recall customized settings. Mastering these functions unlocks the receiver’s full potential for a personalized audio experience.
Remote Control Programming
As of 03/24/2026‚ programming the RX-V377 remote for other devices requires setup. First‚ ensure the target device is powered on. Press and hold the SETUP button until the power indicator blinks. Enter the manufacturer’s code (consult the manual’s code list or Yamaha’s website).
If the device responds‚ programming is successful. If not‚ try another code. Some devices may require manual code search. The remote can learn commands from other remotes using a learning function‚ detailed in the full RX-V377 manual. Proper programming expands control beyond the receiver itself.
Connecting Devices to the RX-V377
Updated 03/24/2026‚ the RX-V377 offers versatile connectivity. Utilize the HDMI inputs for Blu-ray players‚ game consoles‚ and streaming devices‚ supporting 4K Ultra HD pass-through. Optical and coaxial digital audio inputs accommodate older devices. For vinyl enthusiasts‚ a dedicated Phono input allows direct turntable connection‚ ensuring optimal signal quality.
The receiver also features analog RCA inputs for various audio sources. Remember to select the correct input source on the receiver using the front panel input selector or the remote control. Proper connections are crucial for optimal audio and video performance.

Connecting a TV via HDMI
As of 03/24/2026‚ connecting your TV via HDMI is straightforward. Locate an available HDMI input on the rear panel of the RX-V377. Use a high-speed HDMI cable to connect the HDMI ARC (Audio Return Channel) output on your TV to the designated ARC input on the receiver.
Enable HDMI-CEC (Consumer Electronics Control) on both your TV and receiver for simplified control. This allows the receiver’s remote to control basic TV functions. Ensure the receiver is set to the correct HDMI input to receive audio and video from the TV. This setup enables streamlined audio transmission.
Connecting Blu-ray/DVD Players
Updated 03/24/2026‚ connecting your Blu-ray or DVD player to the RX-V377 enhances your viewing experience. Utilize an HDMI cable for optimal audio and video quality. Connect the player’s HDMI output to one of the available HDMI inputs on the receiver’s rear panel.
Select the corresponding HDMI input on the receiver using the remote control. For older players with optical or coaxial digital audio outputs‚ connect them to the appropriate inputs on the receiver. Ensure the player’s audio output is set to bitstream or PCM for proper decoding by the RX-V377.
Connecting a Turntable (Phono Input)
As of 03/24/2026‚ to connect a turntable‚ locate the “PHONO” input on the rear panel of your RX-V377. This input is specifically designed for the low-level signal from a turntable and includes a built-in phono preamplifier. Connect the turntable’s RCA cables (red and white) to the corresponding PHONO input jacks.
Ensure the turntable is properly grounded to prevent hum. Connect the ground wire from the turntable to the ground terminal on the receiver. Select the “PHONO” input on the receiver. Adjust the volume carefully‚ as the phono input may have a higher gain.

Audio Settings and Calibration
Updated 03/24/2026‚ optimizing your RX-V377’s audio requires careful calibration. Explore the receiver’s settings menu to access options like speaker levels‚ distance‚ and crossover frequencies. Utilize Yamaha’s YPAO (Yamaha Parametric Room Acoustic Optimizer) for automated speaker setup; it analyzes your room’s acoustics and adjusts settings accordingly.

Experiment with sound modes like “Pure Direct” for unadulterated audio or tailor settings for specific content. Fine-tune the bass and treble levels to match your preferences and room characteristics. Regular calibration ensures the best possible listening experience.
YPAO – Yamaha Parametric Room Acoustic Optimizer
As of 03/24/2026‚ YPAO is Yamaha’s automated room correction system‚ crucial for optimal RX-V377 performance. It uses a supplied microphone to analyze your room’s acoustics – reflections‚ distances‚ and overall sound characteristics. Place the microphone at the primary listening position‚ following the on-screen prompts.
YPAO then automatically adjusts speaker parameters like level‚ timing‚ and equalization to compensate for room imperfections. This results in a more balanced and accurate soundstage. Re-running YPAO after speaker placement changes is recommended for consistently refined audio.
Adjusting Sound Modes (Pure Direct‚ etc.)
Updated 03/24/2026‚ the RX-V377 offers various sound modes to tailor audio to your preference. “Pure Direct” bypasses all processing for a pristine‚ original sound – ideal for critical listening. Other modes include “Surround‚” “Stereo‚” “Direct‚” and preset options like “Movie” and “Music.”
Experiment with these modes to find what best suits your content. Access these settings via the receiver’s front panel or remote control. Adjusting the “Extra Bass” feature can enhance low frequencies. Remember‚ optimal settings depend on your speakers and room acoustics‚ so listen carefully and adjust accordingly.
Network and Streaming Capabilities
As of 03/24/2026‚ the Yamaha RX-V377 boasts robust network connectivity. Connect via Wi-Fi or Ethernet to unlock a world of streaming possibilities. This receiver supports popular services like Spotify‚ Pandora‚ and internet radio stations‚ offering diverse audio content.
Utilize the Yamaha AV Controller app (available for iOS and Android) for seamless control and browsing. Network setup is straightforward through the receiver’s on-screen menu. Enjoy music streaming‚ podcast listening‚ and access to online music libraries directly through your RX-V377‚ enhancing your home entertainment experience.
Connecting to Your Home Network (Wi-Fi/Ethernet)
Updated 03/24/2026: To connect via Wi-Fi‚ access the “Network” menu on the RX-V377 and select your wireless network from the list. Enter your password using the on-screen keyboard. For a wired connection‚ simply connect an Ethernet cable from your router to the receiver’s Ethernet port.
The receiver will automatically obtain an IP address. Verify the connection status in the “Network” menu. A successful connection enables streaming services and firmware updates. Ensure your router is broadcasting on a 2.4GHz or 5GHz band for optimal compatibility. Troubleshooting steps are available in the receiver’s manual.
Streaming Services Supported (Spotify‚ Pandora‚ etc.)
As of 03/24/2026: The Yamaha RX-V377 supports a variety of popular streaming services‚ including Spotify‚ Pandora‚ and vTuner internet radio. Access these services through the “Network” menu on the receiver. You may need to create accounts or link existing ones via the Yamaha AV Controller app.
The receiver utilizes DLNA for streaming content from compatible devices on your home network. Regularly check for firmware updates to ensure compatibility with the latest streaming platforms. Detailed instructions for each service are available in the receiver’s comprehensive online manual‚ offering a seamless listening experience.
Troubleshooting Common Issues
Reported as of 03/24/2026: Common issues with the Yamaha RX-V377 often involve sound output or HDMI connectivity. If experiencing no sound‚ verify speaker connections‚ input selection‚ and volume levels. Check the receiver’s mute function and ensure the correct audio format is selected.
For HDMI problems‚ try different HDMI cables and ports. Confirm HDCP compatibility with your display device. If issues persist‚ a factory reset (consult the manual) can resolve software glitches. Yamaha’s support website offers extensive FAQs and troubleshooting guides for the RX-V377‚ providing detailed solutions.
No Sound Output
As of 03/24/2026: If your Yamaha RX-V377 produces no sound‚ begin by verifying the volume level and ensuring the receiver isn’t muted. Confirm correct input selection matching your source device. Inspect speaker wires for secure connections at both the receiver and speaker terminals.
Check if the selected speakers are enabled in the receiver’s setup menu. Test with different audio sources (CD‚ radio‚ etc.) to isolate the problem. Ensure the correct audio format (Dolby‚ DTS‚ Stereo) is selected for your content. A power cycle of both the receiver and source device can sometimes resolve the issue.
HDMI Connection Problems
Reported as of 03/24/2026: When encountering HDMI issues with your Yamaha RX-V377‚ first verify the HDMI cable is securely connected to both the receiver and the source/display device. Try a different HDMI cable to rule out a faulty connection. Ensure the source device’s HDMI output resolution is compatible with your TV or projector.
Within the receiver’s settings‚ confirm the HDMI input is correctly assigned. A power cycle of all connected HDMI devices can often resolve handshaking problems. Check for firmware updates for both the receiver and source device‚ as these can address compatibility issues. Finally‚ test with a different HDMI input on the receiver.
Firmware Updates and Maintenance
As of 03/24/2026: Maintaining your Yamaha RX-V377 with regular firmware updates is crucial for optimal performance and compatibility. Yamaha periodically releases updates to address bugs‚ improve features‚ and enhance streaming service integration. To check for updates‚ navigate to the “Setup” menu on the receiver and select “Firmware Update.”
You can update via Ethernet connection or by downloading the firmware to a USB drive. During the update process‚ do not power off the receiver. Regular cleaning with a soft‚ dry cloth will prevent dust buildup. Avoid using liquids or harsh chemicals. Proper care extends the receiver’s lifespan.
Checking for and Installing Firmware Updates
Current as of 03/24/2026: To check for updates‚ press the “Setup” button on the remote‚ navigate to “General Setup‚” then “Firmware Update.” Select “Update from Network” for automatic checking via Ethernet or Wi-Fi. Alternatively‚ download the latest firmware from the Yamaha website to a USB drive.
Insert the USB drive into the receiver’s front panel port. Select “Update from USB” and follow the on-screen prompts. Crucially‚ do not interrupt the update process – avoid powering off the receiver. The update may take several minutes. A successful update will display a confirmation message. Regular updates ensure optimal performance.

Cleaning and Care of the Receiver
As of 03/24/2026: To maintain your Yamaha RX-V377‚ disconnect the power cord before cleaning. Use a soft‚ dry cloth to gently wipe the exterior surfaces. Avoid using liquid cleaners or abrasive materials‚ as these can damage the finish. For stubborn dust‚ lightly dampen the cloth with water‚ then wipe dry immediately.
Ensure the ventilation slots are free from dust and obstructions to prevent overheating. Do not attempt to disassemble the receiver for cleaning. Regularly inspect the speaker terminals for corrosion. Store the receiver in a cool‚ dry place when not in use‚ protecting it from extreme temperatures and humidity.
Advanced Features and Settings
Updated 03/24/2026: The RX-V377 offers advanced customization. Zone 2 allows audio playback in a second room using speaker connections or a headphone jack. Configure this via the receiver’s setup menu for independent volume control.
Subwoofer Settings are crucial for optimal bass. Adjust the crossover frequency to seamlessly blend the subwoofer with your main speakers‚ typically between 80Hz and 120Hz. Fine-tune the subwoofer level to match your room acoustics. Explore the receiver’s parametric EQ for precise sound shaping. Remember to save your preferred settings for future use.
Zone 2 Audio Output
As of 03/24/2026: The RX-V377’s Zone 2 feature extends audio enjoyment to another room. You can utilize speaker terminals or the Zone 2 line-out for connection. Access the setup menu to enable Zone 2 and select the desired audio source – it can mirror the main zone or play a different input.

Independent volume control is available for Zone 2‚ ensuring customized listening experiences. Headphone connectivity is also supported for private listening in Zone 2. Remember to verify speaker impedance compatibility when using speaker terminals. Proper configuration unlocks multi-room audio flexibility within your home entertainment system.
Subwoofer Settings and Crossover Frequency
Updated 03/24/2026: Optimizing subwoofer performance involves careful adjustment of settings within the RX-V377. The crossover frequency determines which frequencies are sent to the subwoofer versus your main speakers; typically‚ 80Hz is a good starting point.
Subwoofer level calibration is crucial for balanced bass. Utilize the YPAO system for automated setup‚ or manually adjust to achieve desired impact. Phase control (0/180 degrees) ensures proper integration with other speakers; Experiment with these settings to minimize muddiness and maximize clarity‚ tailoring the bass response to your room’s acoustics and personal preference.